Template
Titan 2 supports ready-made templates for your print jobs.
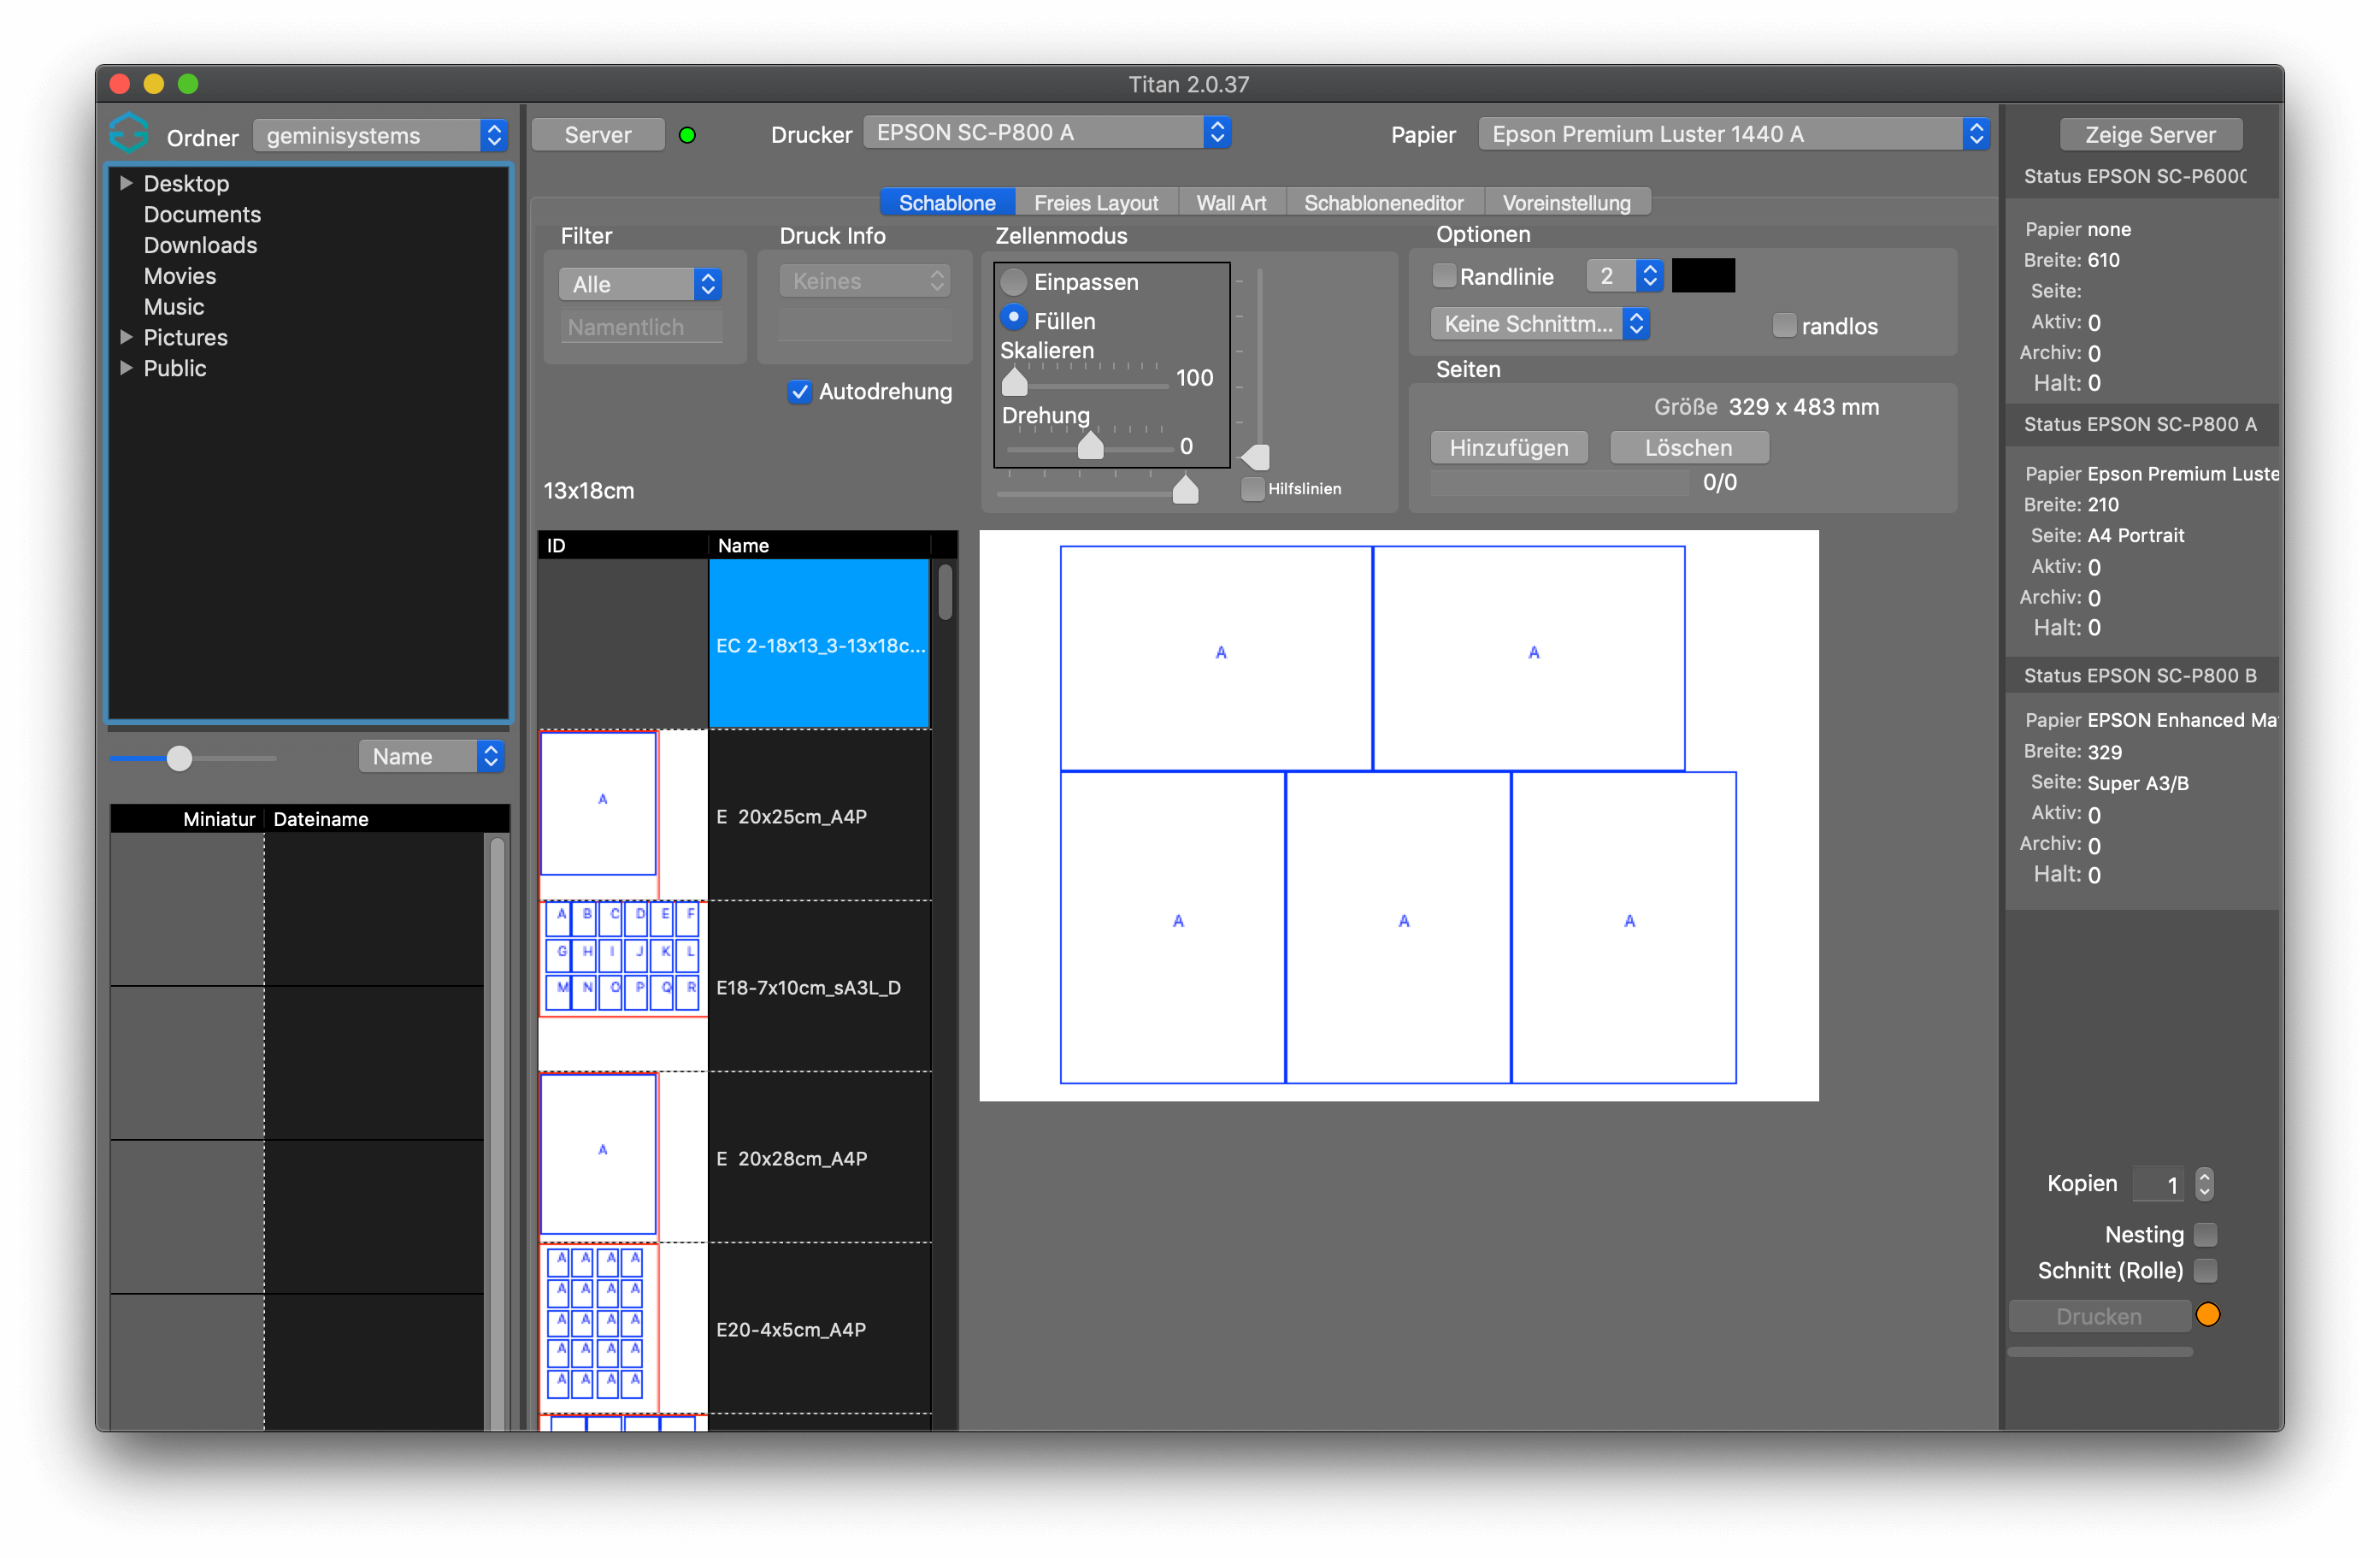
In the Template tab of the program, you will find a list of available templates with preview and names on the left side.

Find templates with the filters
If you have a large number of templates, you can use the Filter menu to reduce the list of all templates to the paper sizes. You can also search by name. Passport templates are sorted under Pass. You can add new passport picture templates using the template editor.
Use templates
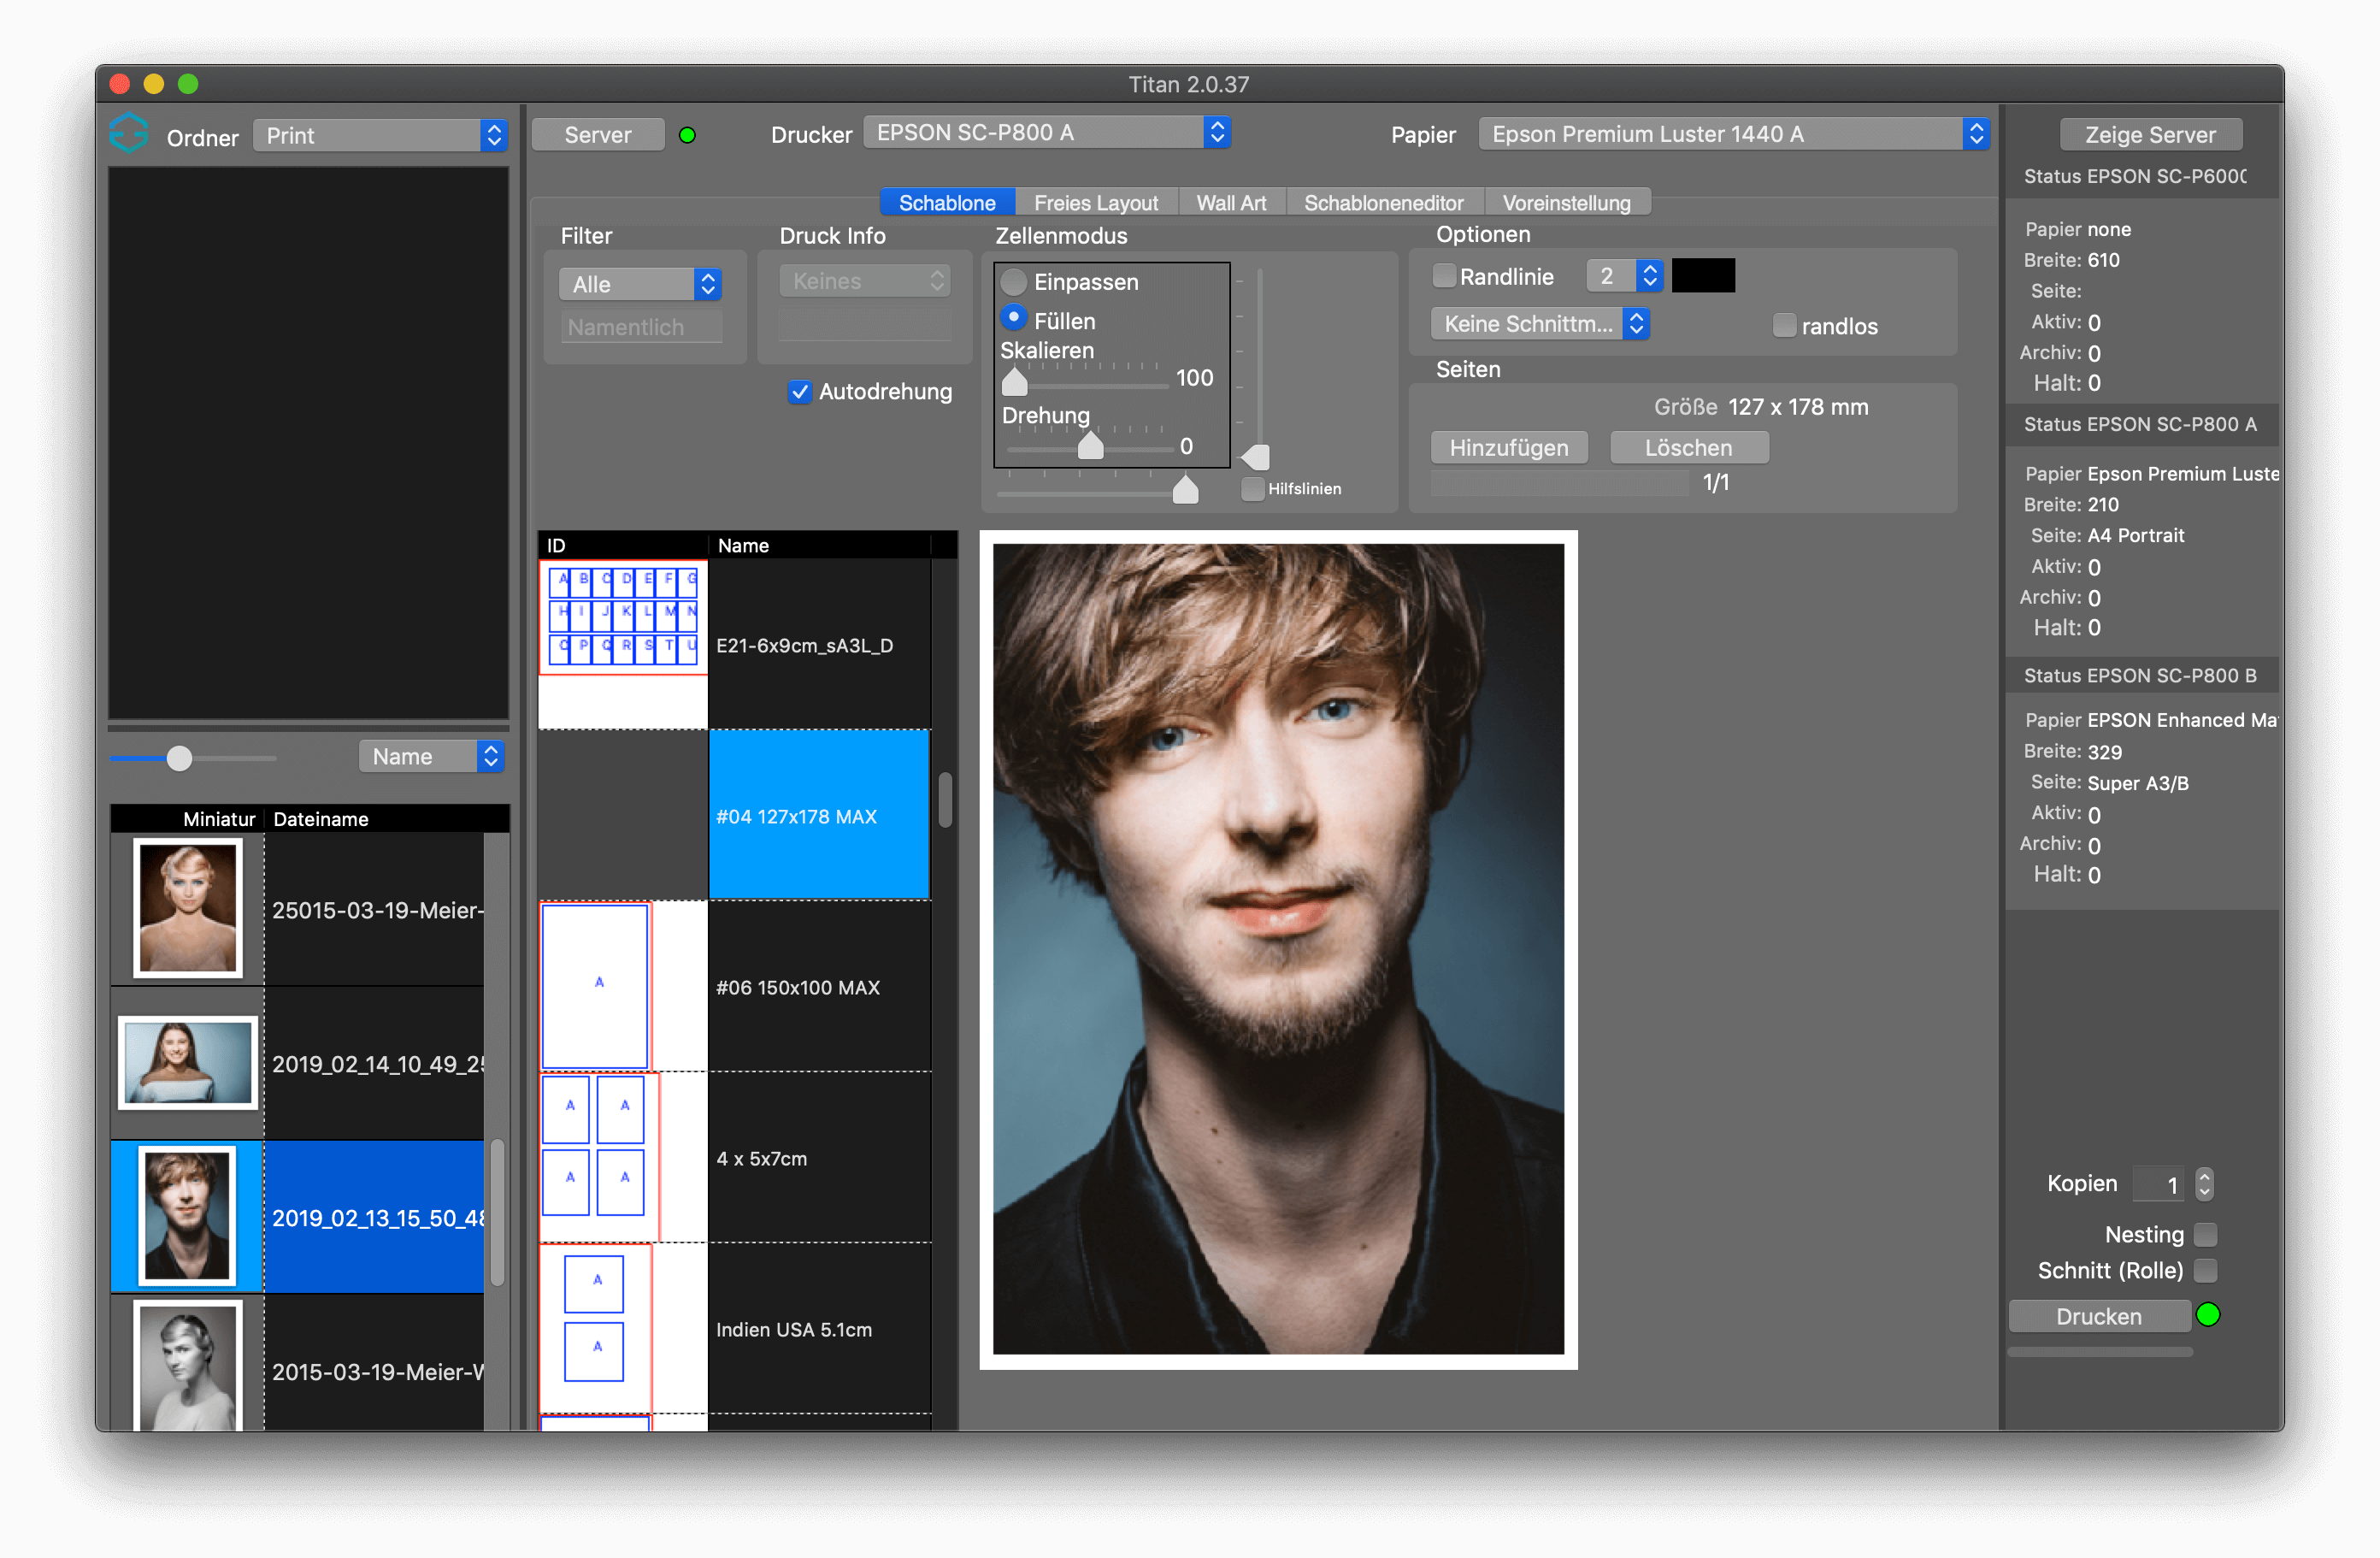
To use a template, simply click on the small preview of the desired template in the list, to the right of the list it will be displayed in a larger preview. Each cell in the template has a blue border to indicate its position and size on the paper. The letter in the cell shows whether it is set in repetition with the same image or only single. All cells with the letter A for example will be filled with the same image when placed on the template. If the letter is different, the cells can be filled with images one by one.
The images are simply dragged and dropped onto the respective cells, either from the integrated file browser or from an Explorer/Finder window. Multiple files can also be dragged onto the template at the same time. These are either distributed continuously over the cells or continuously over several pages.
Stencil edge
All stencils have a margin of 3mm to the paper edge.
Print text under image, e.g. file name - print info
Some templates have orange text cells. The Print Info drop-down menu can be used to select file information to be added under the respective image. "None" leaves the cell empty, file name, (current) date, user defined are always left-justified in black text under the image.
Guides
To be able to position images correctly based on biometric data, Titan 2 offers the possibility to display guidelines for correct positioning. These can be edited in the template editor.
Options
Borderline
You have the option to print the borders of each cell of the template in color by clicking the Borderline option. In the drop-down menu to the right of it, select the thickness of the border line in pixels. You can also select the color of the border line by clicking on the color box to the right of the drop-down menu.
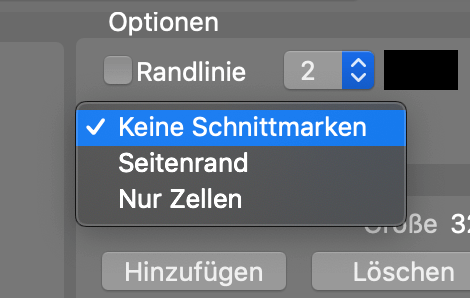
Practical Cut marks for easy cutting.
You have 3 options to choose from regarding cut marks in templates. No crop marks, margin or cells only. Page Margin sets crop marks to the inside of the paper dimensions, Cells Only sets crop marks to the respective cells of the template.
Only cell crop marks make it easier to cut out images with a white background. Crop marks of the page margin, which correspond to the size of the selected template, are important when printing on sheets or rolls that exceed the paper size.
The length of the crop marks can be selected in the selection menu to the right of the crop mark selection.
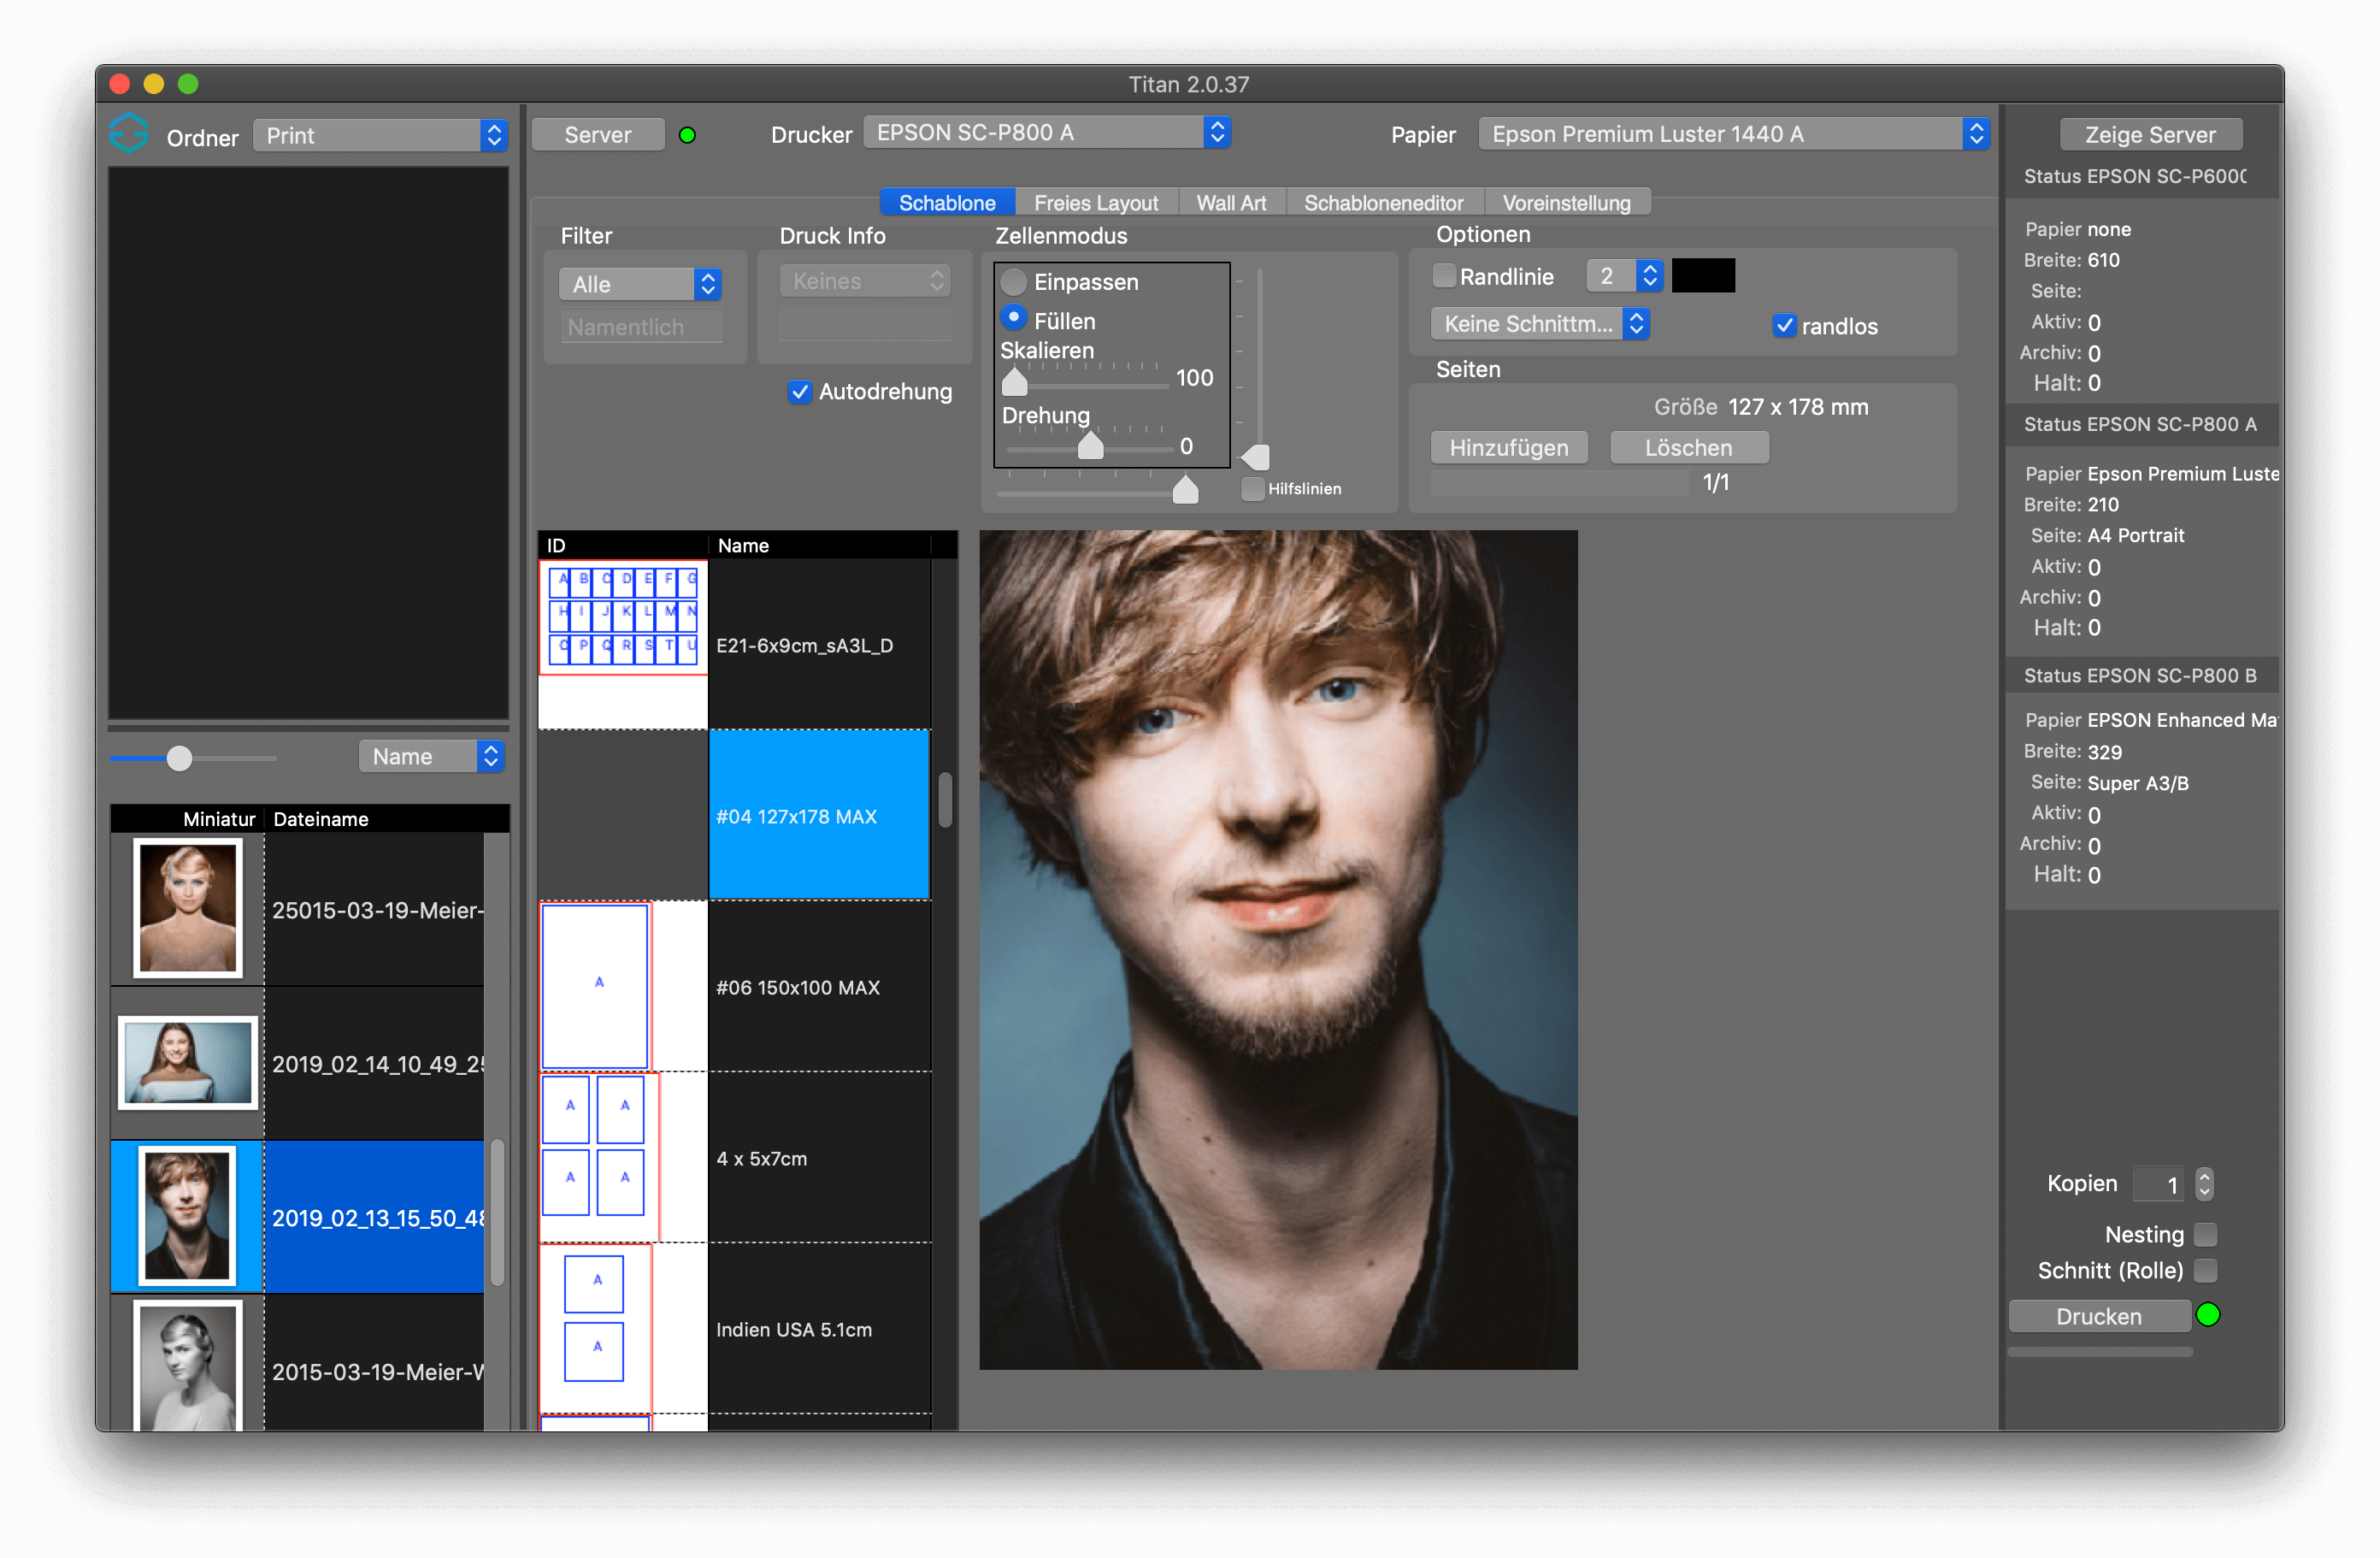
Borderless printing on sheets (10×15-A2)
You can also print the stencils borderless. Selecting Borderless also changes the preview of the template and the edge trimming at the same time. Previously created cell sizes are no longer correct. The size of the borderless extension of the image can be defined in the Titan 2 preferences. If this is set smaller than 6mm, white borders can appear in full bleed borderless prints, these will not be assumed as Mis-Click.
Cell mode - Fill - Fit - Rotate - Scale
Cells can be filled in two different ways, fitting or filling. Fit reduces the image to the appropriate size without cropping the image by the aspect ratio of the cell. Fill fills the entire cell, cropping the image in the border area. Here the cropping can be influenced by the Scale and Rotation sliders and the two Position sliders. The position of the image can also be moved within the template. The scaling is limited to a maximum of 300% magnification to avoid possible loss of quality due to the resolution. The rotation can be changed from -90 degrees to +90 degrees in 1 degree steps. For larger rotation angles, disable auto-rotation and rotate the image manually in 90 degree steps. Please note that depending on the rotation, the sharpness of the image reproduction is reduced and white corners may appear in the cells due to the rotation.

Guides
The guides are projected onto the image in the cell to help with positioning in the cell. However, they do not appear on the printout.
Equipping cells with the same or different images
To populate several cells with the same image, there is the possibility to set different cells as equal using the cell letters. If these are different, each cell is treated individually. If you have consecutive letters in the template and drag several images onto the first cell, the following cells are filled with the following images. If you have only one letter, the following pages are filled with the same image.
Automatic image rotation
When Auto Rotate is selected (default), the images you drag onto the template are automatically rotated for the best fit to the format. If you uncheck this option, you can change this adjustment manually. For a rotation less than 90 degrees, use the Rotation slider.
Create and print multiple pages at once
When you drag multiple files onto a template, more pages are added according to the number of pages. You can add or delete individual pages of the selected template. The scroll bar allows you to select multiple pages. In addition, the template size is displayed in millimeters.
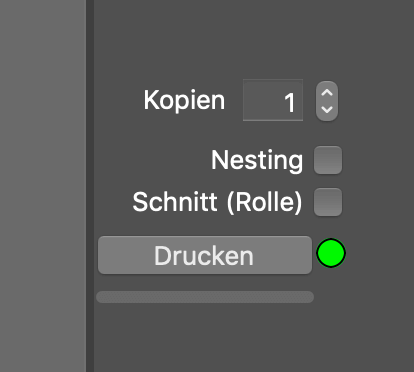
Printing the stencil
When you are finished filling the template with images, you can send the print job to the Gemini12 server by clicking the Print button in the lower right corner of the window. The indicator next to the button shows whether you need to make any further settings on your Gemini12 server. Red indicates a wrong selection of the print medium, always make sure that you have chosen the correct paper size to fit the template.