
Upper toolbar
At the top of the program window you will find the basic settings and the different program tabs of Titan 2.
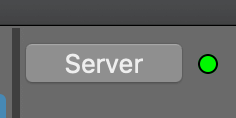
Connection to the Gemini 12 server
Titan 2 normally connects automatically to your Gemini12 server.
In case you want to connect the server manually, click the server button and locate the network drive (if connected) of the Gemini12 server. Select the folder "Gemini" and then the subfolder "Gemini".
The green indicator next to the server button shows that the connection was successful. If it is red, the server is not connected.
This indicator remains red if you do not own a Gemini12 server with connected printers. However, as soon as your computer is connected to the Internet, the remote print service of Gemini is available to you.
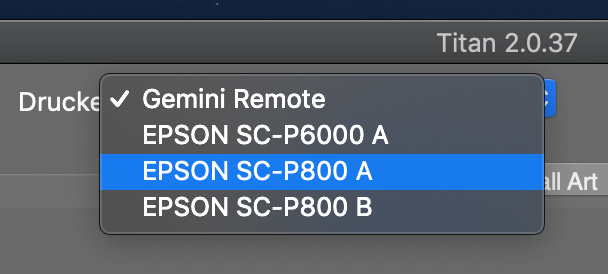
Printer menu
In this selection menu you can select the available printers of your local server. If only "Gemini Remote" is displayed there, you are not connected to a local Gemini12 server.
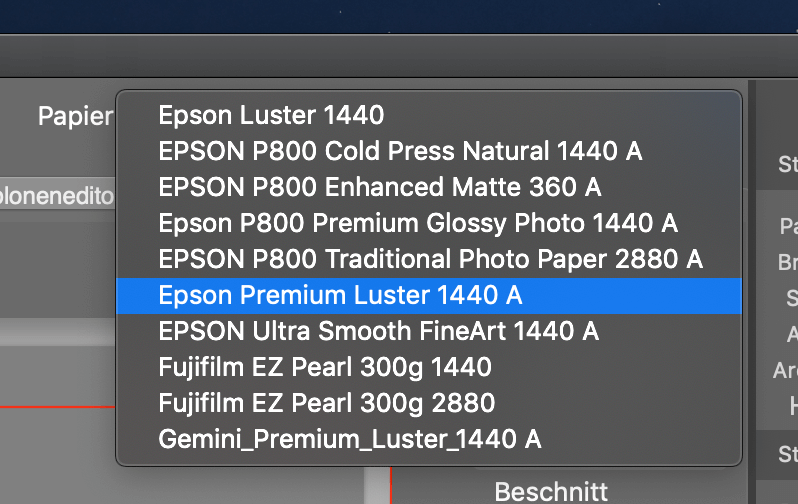
Paper menu
After you have selected a printer, you can select the papers available for the printer in the Paper menu.
You cannot print until you have selected a printer and paper.
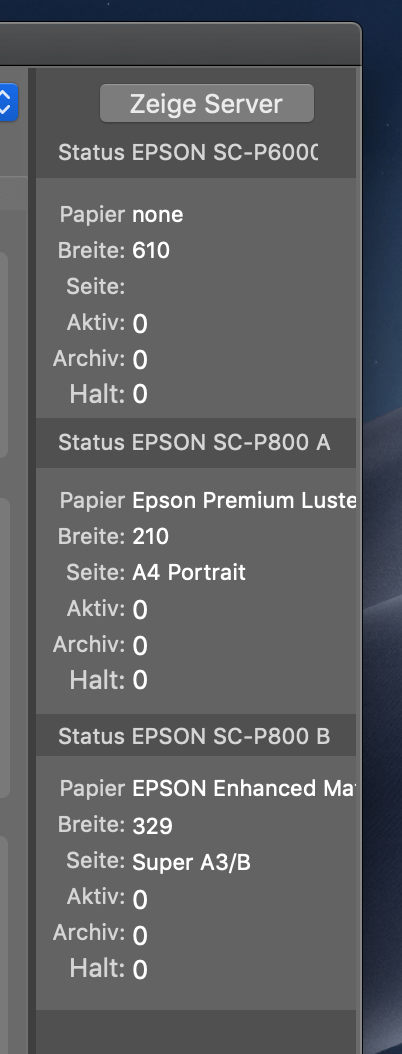
Status of the printers
On the right side of the Titan 2 program window you can see the status of your connected printers (up to 4 printers).
For each printer, the set paper and the paper width are displayed. In addition, the print jobs are displayed, divided into active, archived and paused.
Print jobs are automatically paused if the set paper differs from the required paper.
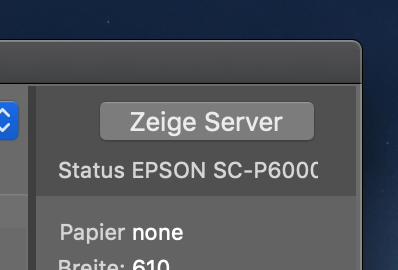
Show Server Button
If Titan 2 is not running on the Gemini12 server, you can use the Show Server button to connect to your local Gemini12 server via screen sharing to change settings or start queues.

Program tab
Currently 5 program tabs of Titan 2 divide the respective functions of the program.